Now is that sweet spot between Halloween and Thanksgiving where I like to get all our fall bulb planting done. The soil temperature has dropped into the 50s and my perennials are still full to see my bare spots for adding more perennials and where I want to tuck in the bulbs. Earlier shared my plan for selected and designing for a succession of bulb bloom into my front perennial border (SEE THE BLOG POST). Now here is a behind the scenes of my planting process.
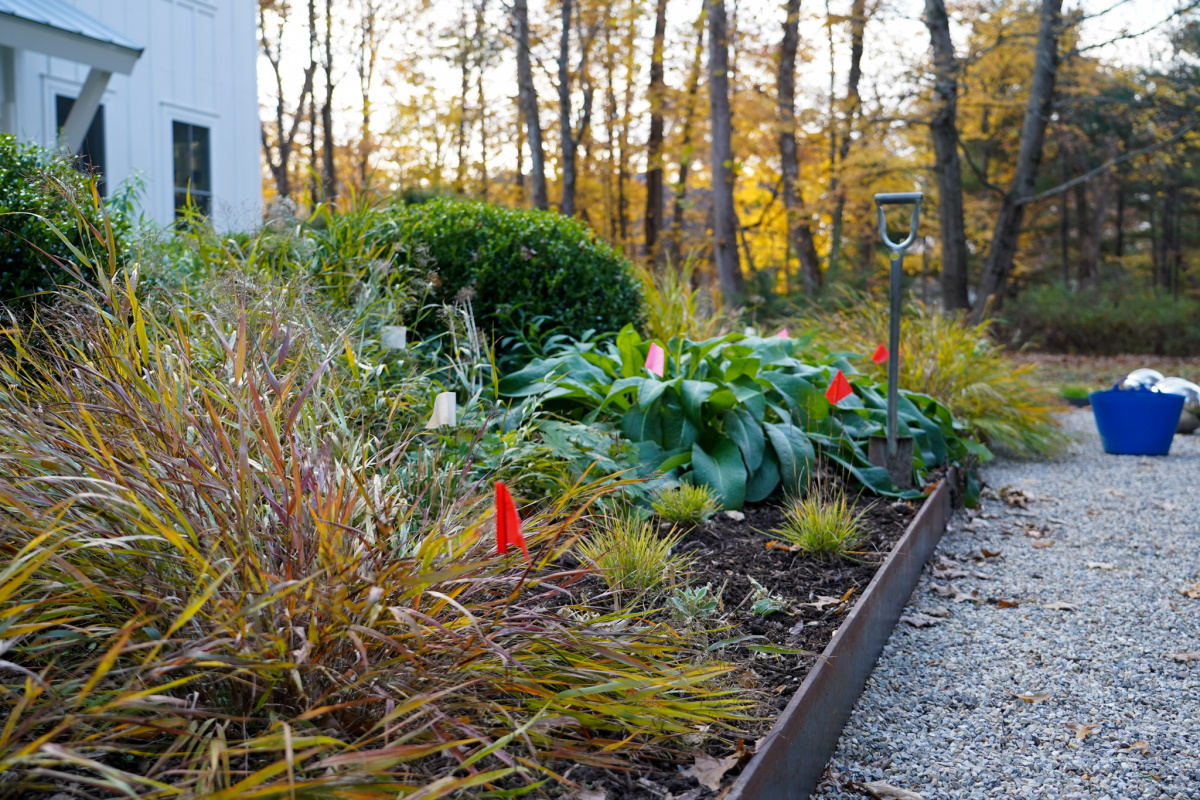
Here is my front garden this week with all the perennials. I have added some additional Seslaria autumnalis along the front of the bed and flag markings where I am planning on placing bulbs. In this case it is important that I add the perennials in tandem to make sure I am not digging up bulbs when I go back and add and edit. It is just so much easier.
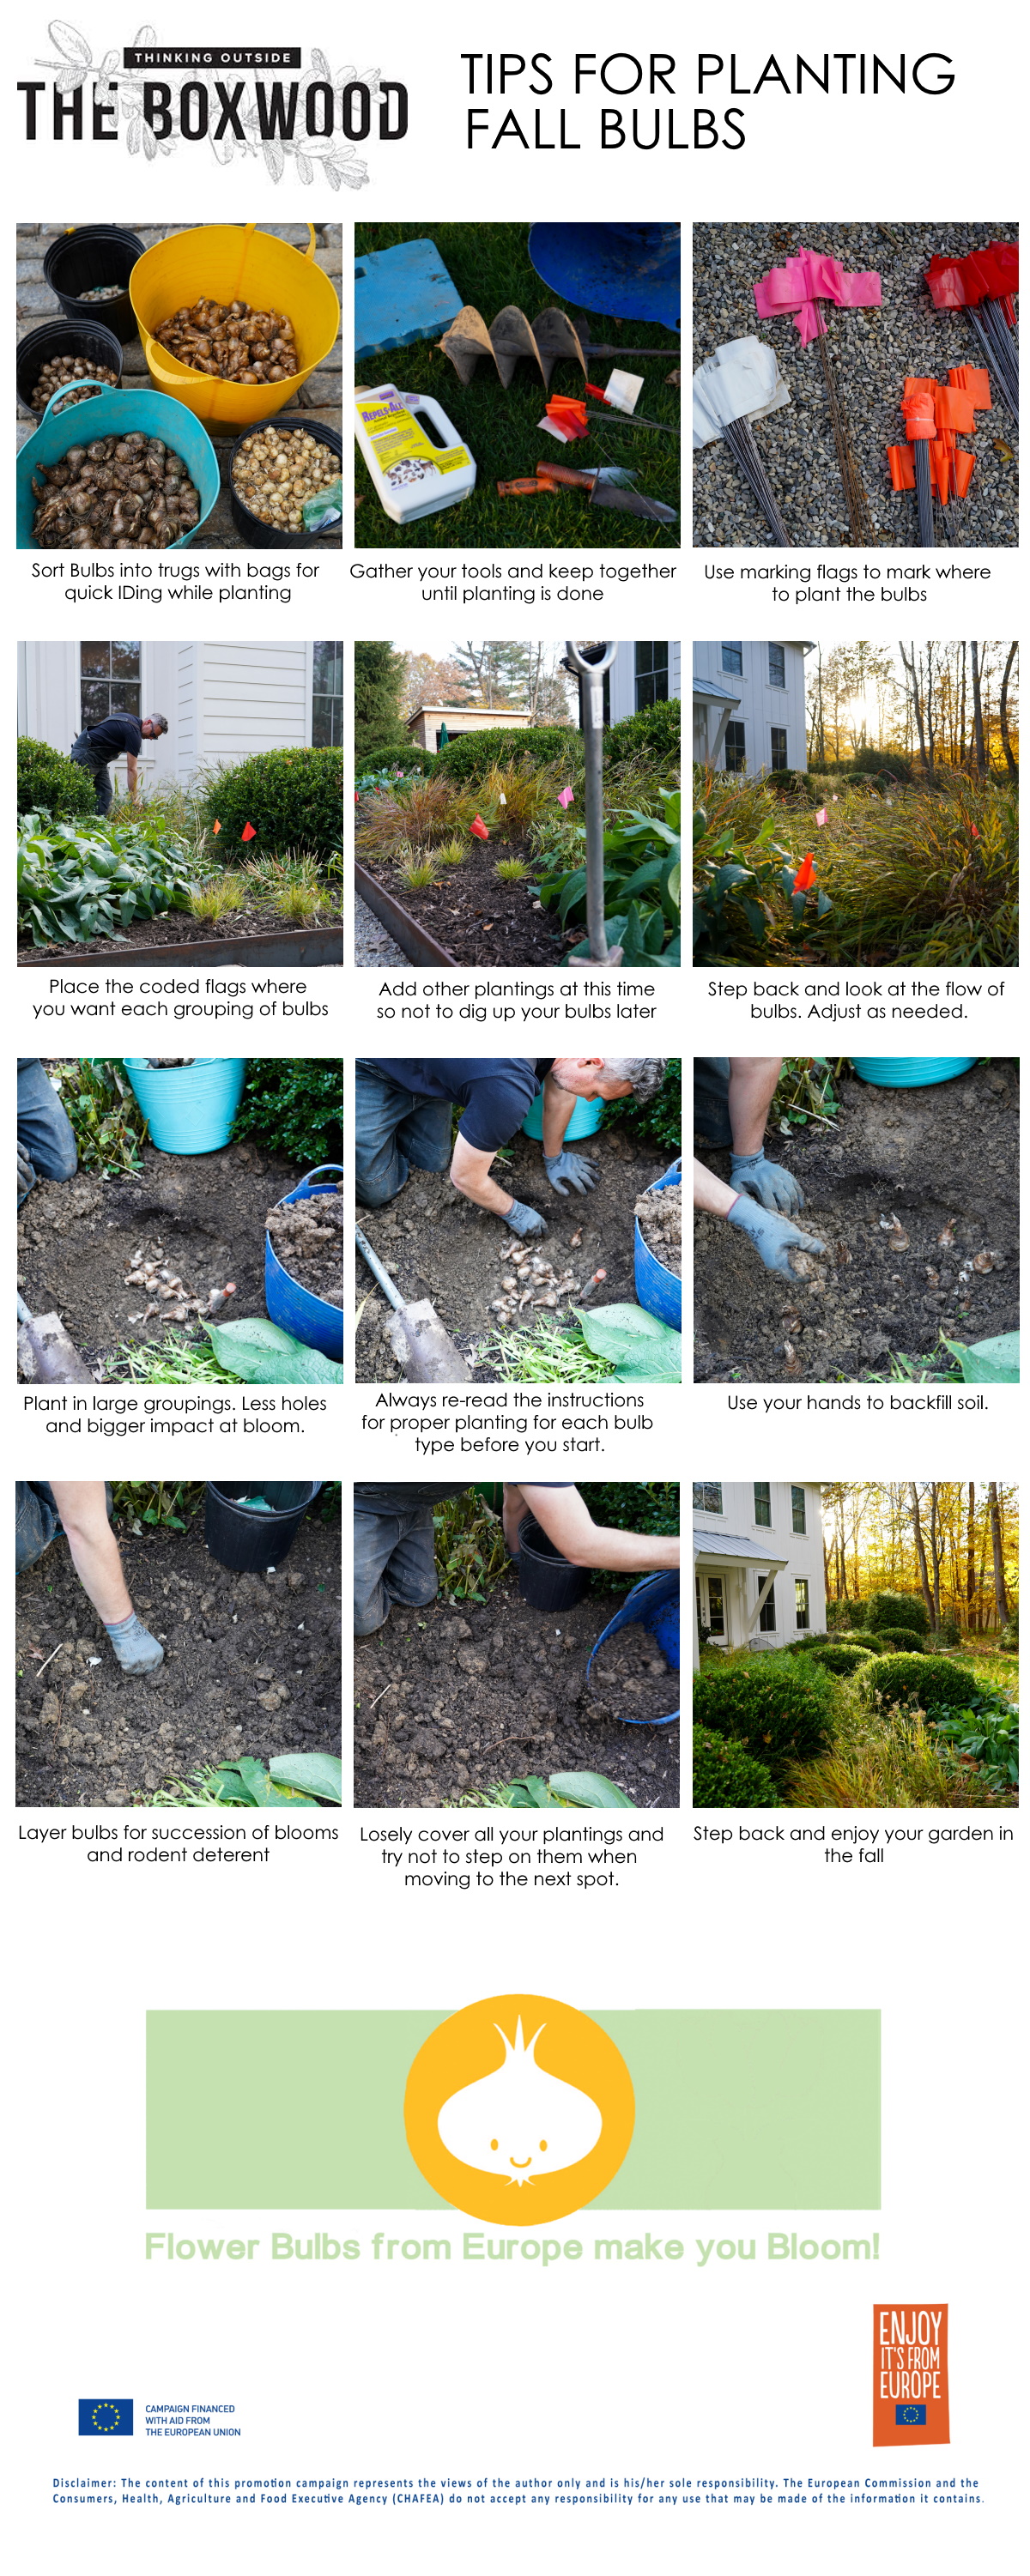
PART ONE: The Preparation
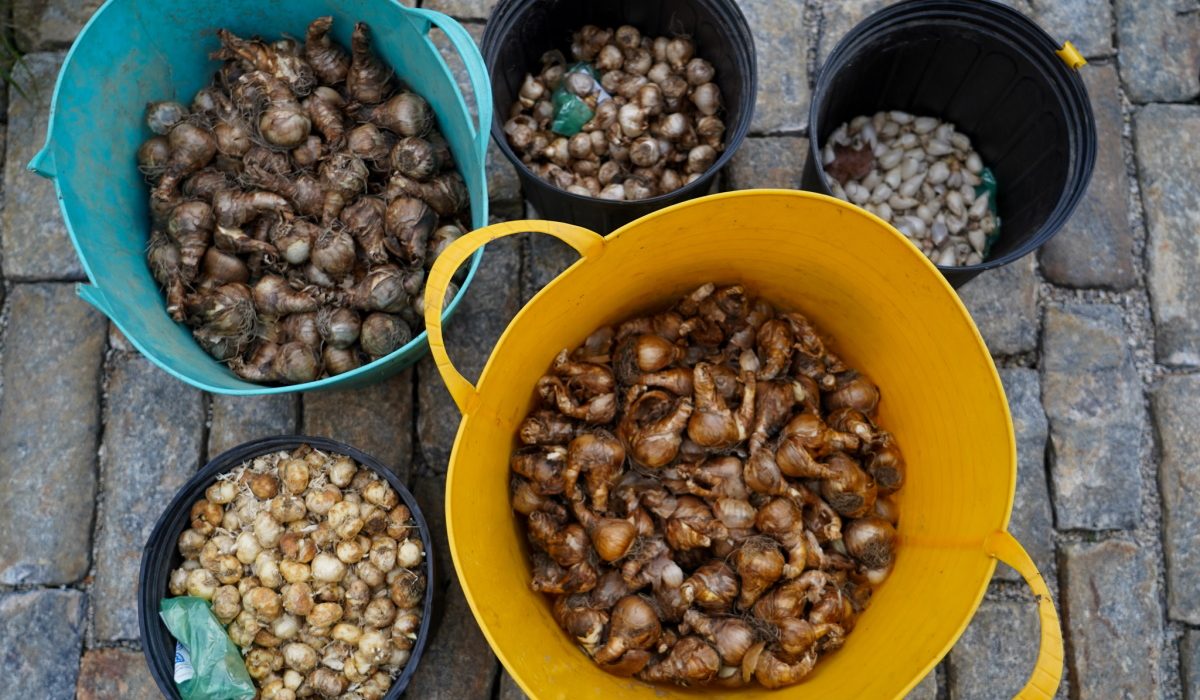
SORTING. After having a planting plan created, the first step is prepping the bulbs for planting. Since I have a specific planting location for all these bulbs, I opened all the bags of bulbs into individual containers. I keep one or two of the bags inside the container incase if forgot which bulb is which. Sometimes they just look too similar. This process also allows me to inspect all the bulbs and make sure they are good to plant.
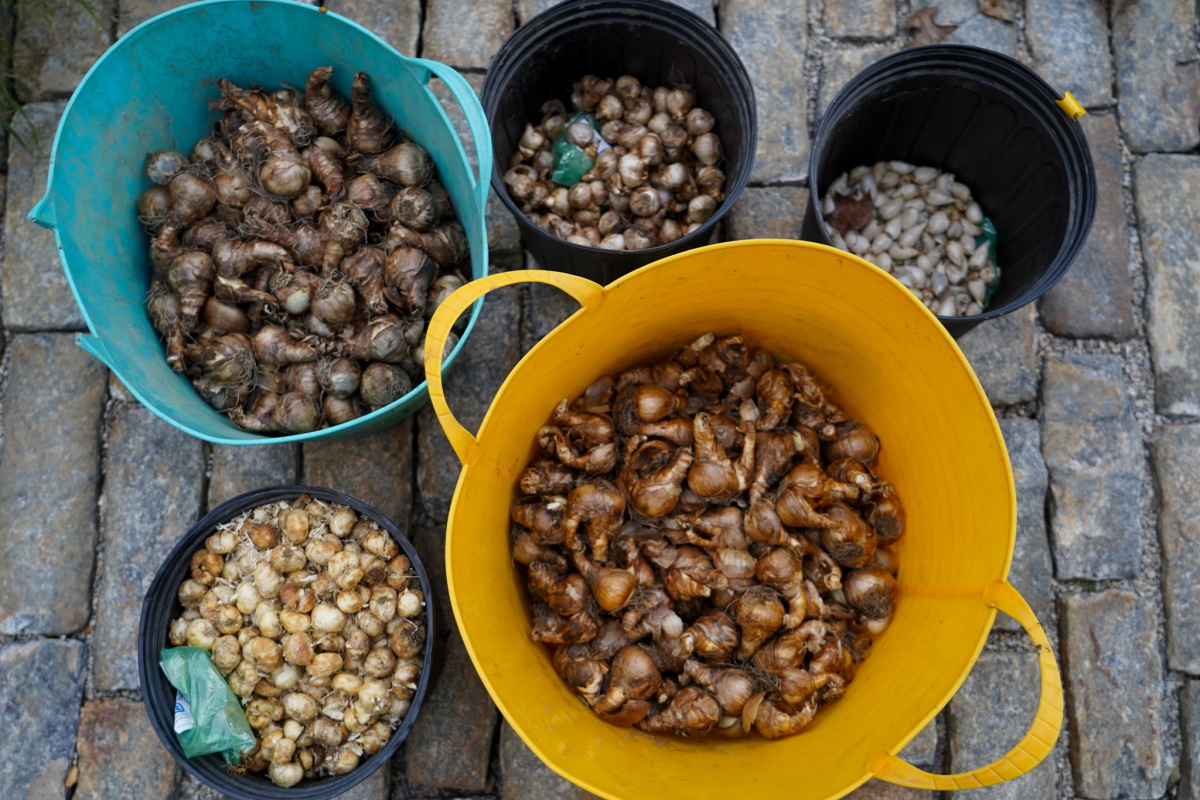
Here I have all my bulbs sorted into different trugs and pots. My planting is occurring over a few weeknights, so keeping one-two of the bulb bags inside the bins helps me confirm I am planting the right bulbs. This really helps when planting a variety of the same type of bulb.
GATHERING THE TOOLS: I also gather all my planting materials and either place in a bucket or wheel barrel to have close at hand. Depending on the number of bulbs planting, you will not get it all done in one go and keeping it all in the wheel barrel allows me to put it way together between planting.

Here is my list of products. I have included links to all the products either from A.M. Leonard (our go to source for work tools) and a few Amazon links.
- Knee Pad: This is a job with a lot of up and down and kneeling in-between plants. This just keeps your knees from aching and getting damp from soil and the older I get the more of a priority saving my knees becomes.
- Soil knife: Some bulbs, like the smaller alliums / crocus, do not require a deep hole and since my soil is well amended, this is an easy tool to dig the holes.
- Spade: This gets the holes started and then the soil knife helps with the final digging/breaking up of the soil. My personal spade is this King of Spades Nursery spade I have had for years.
- Augur: When doing a lot of planting this is really a time saver tool. We have these in different sizes depending on want we are planting. I have the professional size due to the volume we plant and frequency we use it. Auger efficiencies really depends on your soil type. In sandy / light soils the auger can really be a dream. In heavy clay soils the auger can be your worse nightmare. You can find smaller versions that work with battery drills but use caution because in heavy soils you can ruin light duty drill in a heart beat.
- Marking Flags: Since I am planting to have these bulbs work within an existing bed and work with the foliage of perennials, the flags help me do a planned placement of each bulb type. More about this later.
- Rodent Deterrent: Daffodils are natural rodent deterrents, how some of the other bulbs I am planting this is an extra safety measure against our healthy population of rabbits and chipmunks.
- Garden Gloves: To help protect your hands, I like these thinner gloves with a polyurethane palm coating.
- Extra Trugs: I use one to place the displaced soil while digging the planting hole and other for collected the weeds/debris I collect while in the garden. (I like Red Gorilla brand trugs)
What I don’t have
- Bone meal – In the past I have used bone meal as a fertilizer for the bulbs in planting. But I have had rodents / racoons dig up bulbs because they smell the bone meal. Now I use a biochar fertilizer on across the surface instead of in the rootzone.
GARDENER TIP: It is an important note to read the planting directions from the bulb company before you start. You did your research in the purchasing phase, but remind your self on planting depths, spread, or if fertilizing is recommended. FLOWERBULBS.COM is great resource for planting tips or information for researching about the bulbs at designing and purchasing phases.
LAYING OUT THE DESIGN. Since my design calls for specific session of blooms, the placement of the bulbs within the perennials is very important. Using different marking flags correlating to the bulbs allows me to mark the areas I need to place each type. Some areas I am layering bulbs so I place two flags side by side. This method also allows me to step back and look at the positioning of the groupings and make sure the bulbs balanced throughout the bed.

GARDENER TIP: Take a photo to remember were you placed everything. Come spring you will forget where you planted and seeing the flags in relation to your other plantings will help you locate where you have bulbs planted.
PART TWO: FINALLY, THE PLANTING
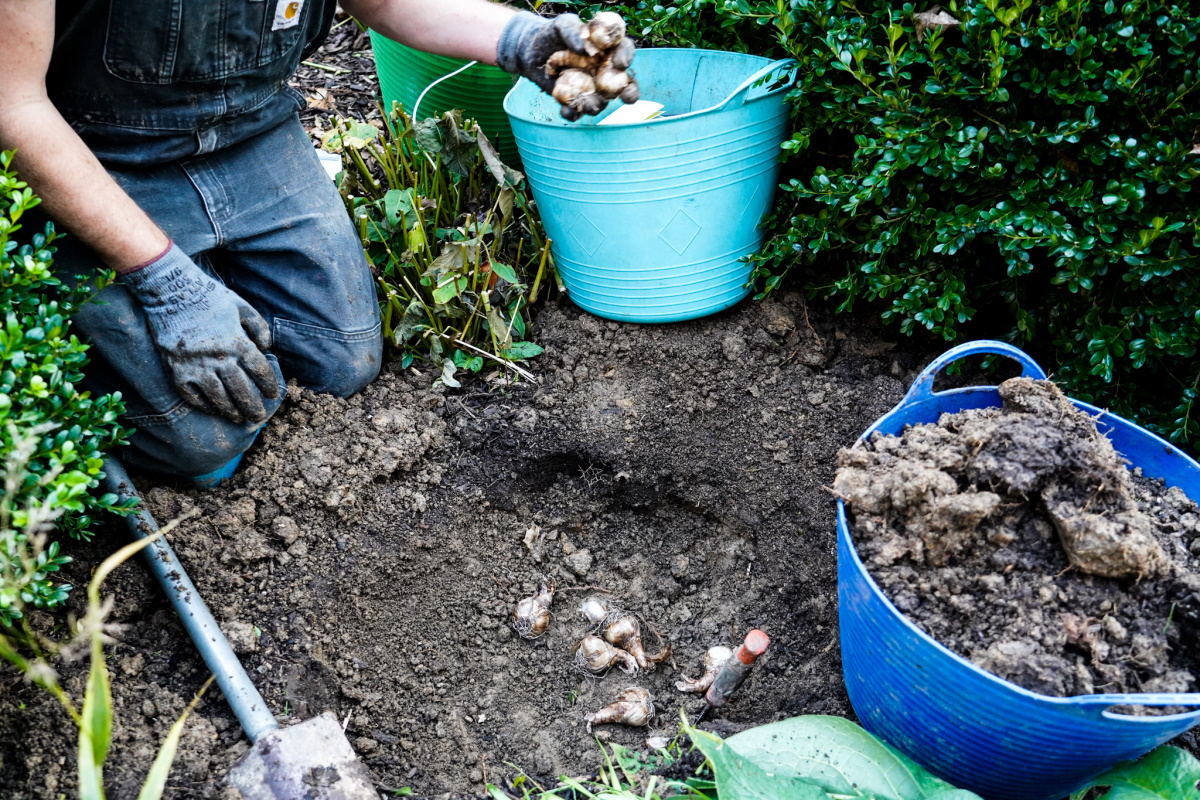
Since I have the flags marking where I am planting and what bulb goes where, I work from one end of the garden to the other. This is a lot of up and down and wedging between perennials to get all the bulbs in. I am including some light fall clean up during this too, which is making the process a bit longer. Note, I leave up all my grasses through the winter so the majority of my cut backs are done in the spring.
I have spent years amending our clay soil with leaf compost / pine fines, and planting the bulbs is another chance to get some soil amendments blended into the the beds.
Here are some tips for the planting:
- Use a trug for displaced soil. Loosen the soil and as you dig place it inside a trug. This gives you control in placing the soil back over the bulbs and ensures you are not covering up any of your other plants.
- Make big clumps of bulbs. I am for at least a minimum of 10 bulbs of same variety per clumping. Ideally I really like the trench method where I dig up a larger area and plant 30-50 at a time for a very large massing. Granted this can’t happen everywhere, especially within an existing perennial border. These big masses of bulbs make more of a color impact that if those same bulbs were spread out into many little holes.
- Pay attention to right side up. For the newcomers to planting bulbs. You are investing all this time and effort into planting. Best to give the bulbs the best chance of growing strong. Make sure the roots are point down. You can reference Everything About Flower Bulbs at FlowerBulbs.com for more details.
- Layer Bulbs. I am placing different session of bulbs in the same hole. Early with late. The later blooms will cover up the foliage of the earlier blooms and be less clean up I need to manage in the garden.
- Group bulbs to use others rodent deterrent. The daffodils are naturally deer and rodent deterrents, so those are planed with bulbs that are less so to help keep them from being nibbled. Additionally The Crown Imperial (Fritillaria imperialis) will actually repel borrowing rodents from your beds.
- Remove flags once you planted. This will help you know where you have planted and see what is left.
Bulbs are really easy planting, I promise you. However here is a quick reference guide: Please also for any other questions a wonder reference is Everything About Flower Bulbs at FlowerBulbs.com
This bed is not the only bulb planting I am doing before Thanksgiving. Every year we add to the decades old drifts on the property. This year I have some Apricot Whirl Daffodils that will be going at the woodland edge closest to our driveway. I also placed a large order of Summer Drummer Alliums after seeing the flower heads in a garden this summer. The mature height is four to six feet, so will be great in taller perennial beds.
If you have any questions about planting bulbs or varieties I have had success with in years past, please reach out. There is still time to purchase and plant. Online retailers have already reduced prices, just make sure your bulbs are shipping within the USA. If you are concerned about delivery, visit local garden centers, big box home improvement and grocery stores (Whole Foods has good selection), just note they may have not reduced pricing yet. For timing, I have also planted past Thanksgiving and had success. I have actually broken many of the bulb rules and had success, so don’t stress too much. If you are able to get into the garden and dig the holes, plant some bulbs.
Finally, I will keep everyone updated as the bulbs start appearing this spring both on the blog and Instagram. I have a stone wall I am building in a neighboring bed as a winter project so will be sending a lot of time in the front garden over the winter and spring.
This post was sponsored by Flowerbulbs.com
![]()