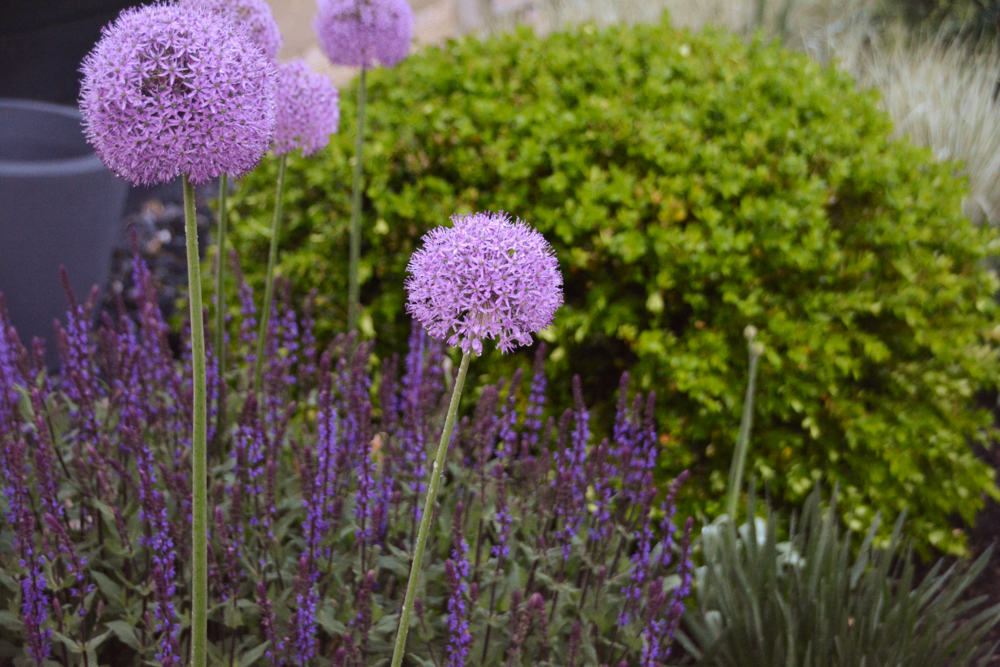
Design 101: Espalier

Design 101, Formal Garden, G A R D E N S, gardening, Inspiration

Espalier Defined:

The process of manipulating the growth of woody plants into a flat (2-D) plane by trimming and tying branches. Commonly used with fruit bearing trees against structures; horizontal clipping encouraging fruit production and radiant heat from walls prolonging growing period.  Used for both form and function in a landscape as focal points, delineate areas, screening and fruit production. (Follow my pin board for examples)


Designing for Espaliers:

The practice of training fruit bearing plants dates back to the Romans/Egyptians, but it was the Europeans, specifically the French who have influenced and perfected the designs we see today.

  • Great  for small spaces with limited space for growth. Planted root bulbs can be planted next to building foundations with 4 inches between plant and wall.
  • Instant impact when purchased as fully trained specimen.
  • Provide structure and form in the garden during the winter.


Variety of woody plants can be used for Espaliers. I recommend finding something that isn’t too vigorous a grower if buying an established espalier, or else you will be trimming all the time. Also look for good horizontal branching structure.

Here is a list of Ornamentals good for Espaliers:

  • Gingko biloba
  • Fagus sylvatica culivars – i.e Tricolor beech
  • Acer palmatum cultivars –
  • Pyrus calleryana- Callery pear
  • Tillia- Liden
  • Katsura- Katsura
  • Cedrus atlantica – Blue atlas Cedar

Of course there are the fruit bearing woody plants that this method was developed include varieties of apples, pears, plums, peaches, etc.


Espalier Designs:

There is a lot of documentation on how to train an espalier, however training a mature espalier will take up to five years with the faster growing varieties. I recommend purchasing a fully trained tree, however it will be an investment. There are some amazing growers specializing in espaliers and are craftsmen at creating the technique.


Your local nursery may have one of the traditional espalier designs and varieties in stock or can order one for you. (Always ask if they will order you a specific plant if not in stock. You might have to wait a bit, but you can get the less common plants this way.)


If you would like information on training your own espalier I recommend - Pruning and Training Plants : A complete guide, David Joyce. This book breaks down pruning and training by the plant type so you can get the specific information based on the plants natural growth characteristics.   Also The Edible Front Yard by Ivette Soler (pg 28-29) has a great step by step.


Examples of Espaliers:

The practice of espaliering has been traced back as far as the Egyptians, but it was the French that have perfected the methods we follow today.  There are many different styles defined, but I have listed the most common methods below with examples. I have listed the most popular designs below, but there are many more designs.


Cordon – This is the historical method for growing espaliers. The horizontal method is best for producing fruit, but there are also the simple vertical designs. Can be grown against walls, fences and stand alone.

  • Vertical Cordon
  • Oblique Cordon
  • Horizontal Cordon
  • Single “U” Cordon
  • Double “U” Cordon

Candelabra -  I have often seen this grouped within the Multiple Cordons categorized as a Multiple Cordon/Triple U Cordon. This is great for growing up on vertical walls, and is named for the shape looks exactly like a candelabra. Note I have also seen the Palmette Verrier called a candelabra, I am researching to fine the definitive answer on this one)


Palmette Verrier and Palmetter Oblique – The distinguishing feature of the Palmette Verrier is the central stem with side branches turning from the horizontal to the vertical in a  90 degree angle. The Palmetter Oblique also features a central stem, but has oblique or diagonal branches.  The Goblet is a version of the Palmetter Verrier, but instead of the 90 degree turn up, the branches are trained at a curve from the central stem.


Belgium Fence –This design features multiple trees (at least five) trained together into a design that intercept on the oblique/diagonal.  Spacing is key on this design to ensure balance in the pattern is symmetrical.


Free form/Informal designs – Like any design rules, great things can happen when they are broken.  The only rule with informal espaliers is to keep the 2-D plane and allow the branches to follow any pattern you desire.


(Image credits: 1, 2 – personal photos,  3, 4, 5, 6)


If you like the green vertical walls, here are some additional terms/design methods to research:

  • Pleaching (see previous blog post – here)
  • Green Walls (such as woolly pockets)
  • Natural Climbers (Examples include – Ivy, Roses and Wisteria)

Design 101: Pleaching

Design 101

(Read Previous Design 101 here)

Pleaching is the method of training multiple trees into a single horizontal plane, or one continuous line. It is often used to create allees or hedges. More frequently seen in European garden design, the training takes dedication to clipping and time to mature. Most often the branches are clipped to expose the trunks. 
EXAMPLES OF PLEACHING

A classic example of pleached trees. 
Image from Jinny Bloom
Hornbeams pleached across an allee of trees.

Image n.mccullough

 These are European Hornbeams pleached into an Allee.

Image n.mccullough
RECOMMENDED TREES & PLANTING:
Trees that work well for pleaching include;  Hornbeams, Linden/Lime, and Pear. My personal favorite to use are Hornbeams, but I am also experimenting using Buckthorns in my back yard. When planting you should look to 3-4 feet spacing between each tree. 
Here you can see a more natural landscape with a line of pleached trees. 
Image from here.
Image n.mccullough
From this photo you can really see the structure of the branches creating the unified green wall. This very tall allee of pleached trees is at Arley Hall in England.
Image from here.

I could post 20 more photos of different gardens using pleached trees, but I am going to stop myself from going over board since I think you now understand the technique. Keep your eyes out, I think you will be noticing a lot more pleached trees.

Design 101: Brick Paver Patterns

Brick, Design 101

This is my first post in what I hope will be an ongoing series of Landscape Design 101′s on popular styles and terms used. My goal is to provide the basic knowledge for novice designers to either do a project themselves or talk to a professional installer/designer about what they would like for their home. If there are any particular topics you would like for me to feature, let me know.

My first 101 is the top four brick patterns used in the garden; Running Bond, Stacked Bond, Basket Weave, and Herringbone. There are millions of ways these patterns can be installed, intermixed and used with different types of hard surfaces. Once you know these basic patterns you can start experimenting. 


Four Basic Brick Patterns
Running Bond is one of the most common patterns used. It is easy to lay and  works great in areas that are tricky shapes .
This is a very simple pattern, but not commonly used.  I could see this simplistic pattern used in a modern landscape, compared to a more traditional space.
Depending on the size of your brick this can be done with two or three bricks.  
There are two types of Herringbone patterns, 45 degree and 90 degree. You can see the difference by comparing the next photo. The 45 Degree is the most difficult and most expensive to lay since it has the most cuts and wasted material. 
In comparing to the 45 degree herringbone, you can see that this method is easier to lay, and would require much less cutting. 
In laying bricks a Soldier (or Sailor) Course is often used to transition between styles or along the edges. You can see from the photo below the use of a Soldier Course in both cases.

Four Types in Use
Now, here are examples of the four different types of patterns used in the landscape. You can see the different types of patterns can be used in may different types of landscape styles. (I am missing an example of stacked bond, but will keep looking.)

90 degree Herringbone walkway

45 Degree Herringbone on the thin edge of the brick.
Running Bond. See how it emphasis’s the circular bed.
Running Bond on thin edge of brick.

Basket Weave that transitions into Running Bond.
Image from Flickr.

A Little bit more on Bricks. 
There are two main types of bricks (handmade and factory), and within those two types there are many different color and finish options. I typically prefer handmade bricks that have a little age and quirkiness to them, but you if you do your research you can find some factory bricks that look handmade.

There are also two main type of installation methods for brick walkways, driveways and patios; Wet and Dry. This is totally your personal preference for installation and aesthetic. Wet means it is set in concrete on a concrete base. Dry means it is on a stone aggregate base and is kept in place by using and edger (Metal or plastic). The joint are then filled with sand (I prefer using a poly-sand).  All the images above are dry, but below are two examples of wet. Which ever way you choice, make sure the sub-base is sufficient for the installation method, planned use and climate.

Source: nick mccullough
Running Bond (wet laid)
Wet laid herringbone and running bond